Waterproof Large Tail Bag for All-Day Long-Distance Rides
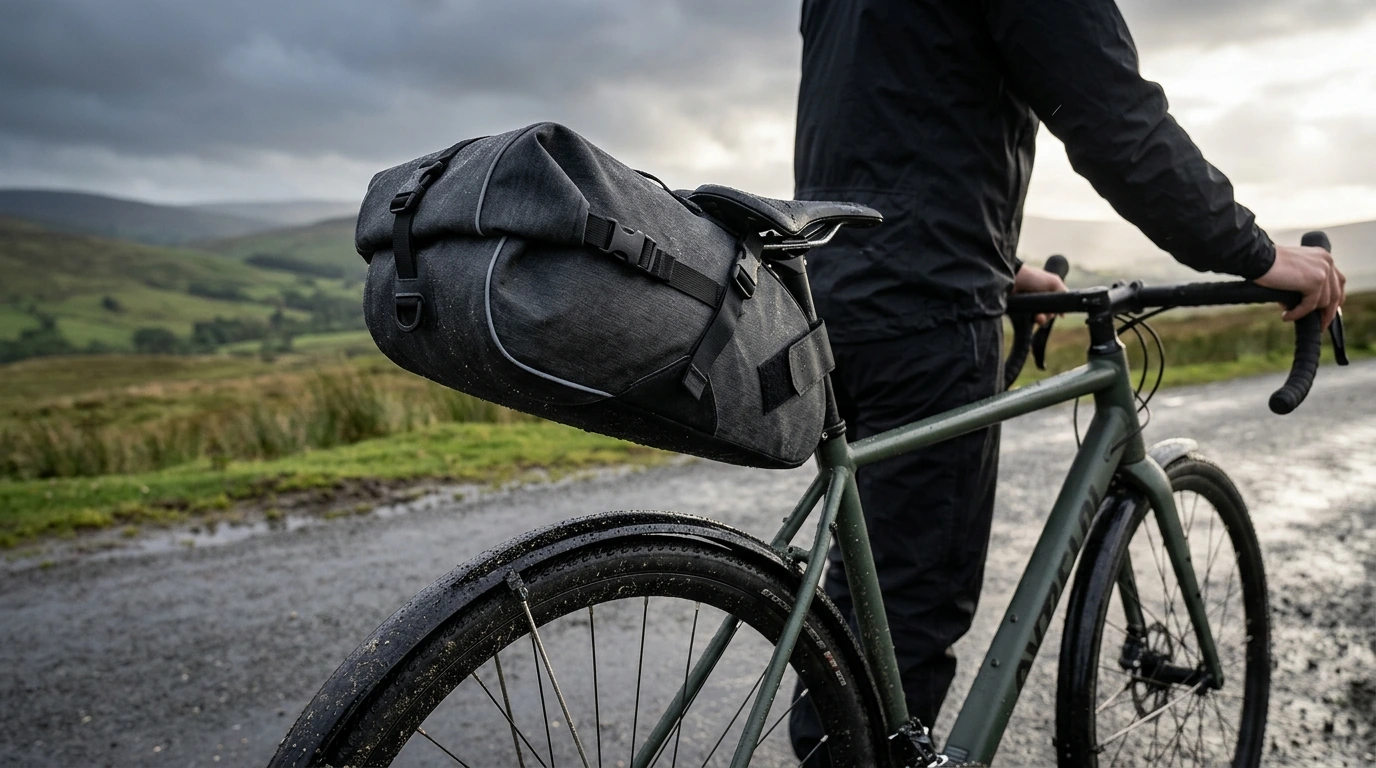
Waterproof Large-Capacity Bicycle Tail Bag for Long-Distance Rides
A tail bag built for long rides should stay stable over rough pavement, keep essentials organized, and protect gear when weather turns. The right setup makes packing feel routine: you know what fits, where it goes, and how to reach it quickly without unpacking everything on the shoulder of the road.
What a Long-Distance Tail Bag Needs to Do
On endurance rides, a tail bag becomes your “mobile drawer.” It has to carry ride-critical items without swaying, hold its shape when partially full, and keep contents protected from the two kinds of wet you’ll encounter: rainfall from above and road spray from below.
- Carry essentials without swaying: tools, tube, pump/CO₂, snacks, layers, lights, and a compact lock (if needed).
- Resist rain and road spray; closures and seams should minimize water ingress during sustained wet conditions.
- Mount securely under the saddle/seatpost with minimal bounce and no interference with pedaling or rear wheel clearance.
- Allow quick access mid-ride: a top opening, structured shape, and internal organization reduce rummaging at stops.
- Add safety: reflective elements and a rear light attachment point help when riding at dawn/dusk.
Capacity planning for common long-ride essentials
| Item group | Examples | Packing tip |
|---|---|---|
| Repair kit | Tube, tire levers, patch kit, mini tool | Keep in a small pouch so it’s easy to grab at the roadside. |
| Inflation | Mini pump or CO₂ + inflator head | Place along the side of the bag to reduce bulge and improve stability. |
| Nutrition | Bars, gels, electrolyte tabs | Separate from tools to avoid wrapper tears and sticky messes. |
| Weather layer | Packable rain shell or arm warmers | Roll tightly; put on top for quick access when clouds build. |
| Safety | Rear light, reflective band, ID card | Store ID in an inner pocket; keep light mount accessible. |
| Personal items | Phone, keys, cash, sanitizer | Use a zip pocket to prevent small items from sinking to the bottom. |
Waterproofing That Holds Up on Wet Roads
“Waterproof” can mean different things in practice. For long-distance riding, the goal is to keep your core items functional after hours of damp exposure, not just survive a quick drizzle.
- Material matters: waterproof-laminated fabrics (often TPU/PVC-style coatings) shed water better than basic woven textiles that eventually wet out.
- Seams and closures are the real test: welded seams and roll-top styles commonly outperform stitched seams in heavy, sustained rain.
- Zippers can be weak points: covered or water-resistant zippers and a storm flap reduce seepage when spray hits the bag repeatedly.
- Road spray is different from rainfall: grit-laced water thrown upward from the tire can soak lower seams and straps; placement and a rear fender help.
- Use “dry-bag habits”: pack electronics in a small inner dry pouch for redundancy on multi-hour wet rides.
Before a big day, check a reliable forecast so you can pack a layer and plan storage accordingly; NOAA is a solid reference for U.S. conditions.
Stability, Mounting, and Bike Fit Checks
A large-capacity bag is only as good as its attachment. A stable bag feels like it disappears—no side-to-side tail wag, no bouncing on broken pavement, and no surprise tire rub when you stand up and accelerate.
For fit and setup fundamentals (seatpost and saddle interfaces), the repair guides at Park Tool are a dependable starting point.
Organization and Access on All-Day Rides
If you’re exploring longer self-supported routes and want broader packing ideas, Adventure Cycling Association offers practical touring and bikepacking resources.
Care and Setup Tips for Reliable Performance
A Practical Pick for Long Rides: Waterproof Large-Capacity Tail Bag
Shop the Waterproof large-capacity bicycle tail bag for long-distance rides to streamline your long-ride packing with a more weather-ready setup.
Quick checklist before ordering
| Check | Why it matters | What to measure/confirm |
|---|---|---|
| Clearance | Prevents tire rub and bag damage | Gap between saddle and rear tire; allow extra when loaded |
| Strap routing | Improves stability and reduces sway | Saddle-rail strap paths and seatpost strap position |
| Capacity needs | Avoids overstuffing and poor closure | List of essentials for your longest ride duration |
| Light compatibility | Maintains rear visibility | Rear light mount point or clip-on area |
| Weather routine | Keeps contents dry long term | Inner pouches for electronics; drying plan after wet rides |
More In-Stock Essentials
FAQ
Will a waterproof tail bag keep contents dry in heavy rain?
Waterproof fabrics help a lot, but real protection depends on seam construction, the closure style, and whether the bag is overstuffed. For heavy rain, fully seal the closure and add a small inner dry pouch for electronics as backup.
How do you stop a large saddle bag from swaying while pedaling?
Tighten all attachment points evenly, use saddle-rail straps plus a seatpost strap, and re-check tension after the first few minutes of riding. Pack heavy items low and centered, and avoid loading more than the straps can stabilize.
How much capacity is enough for a full-day ride?
A full-day ride usually requires space for repair + inflation, steady nutrition, and at least one compact layer, with extra room if you’re fully self-supported. Capacity needs vary with weather swings, how remote your route is, and whether other storage (jersey pockets or a frame bag) shares the load.







Leave a comment